Posts

Fixing Fahrenheit-to-Celsius as a one-off conversion template

As someone living in the United States, we use Fahrenheit for temperatures and imperial measurements for measuring things. (Including measuring ingredients by weight or volume, depending!) Which is why my HA uses Fahrenheit/imperial. But in 3D printing, I use Celsius. Sometime in August/September 2021, Home Assistant broke part of my process. It could be that my customization.yaml file's "C" designation broke, or that Home Assistant figured out what was going on and decided to "help" me by converting Celsius from the printer into Fahrenheit. Doesn't matter - end result: my Octoprint sensors were reporting Fahrenheit temps instead of my desired Celsius. First step: Create conversion template entities I added this to my configuration.yaml file: sensor:   - platform: template     sensors:       octoprint_micro_actual_bed_temp_c:         friendly_name: "Micro Bed (°C)"         ...

Setting up an alarm system using Z-Wave door sensors and Sonos speakers

Image
Setting up an alarm system is fairly intrinsic to a lot of Home Assistant implementations. If you're looking at ADT, Simplisafe...other options, you get their system and their controls - and you pay a monthly subscription for the good stuff. Home ownership, you get a discount on your home insurance if you have a security system that hits a third-party reporting service. Home Assistant doesn't get you there until you add something like Noonlight. Noonlight will be a future addition - this is already a long process. Materials: Door Sensors (I used Ecolink Zwave Plus [DWZWAVE2.5-ECO], $30 for each set of sensors - so $60 for front/back door) A Z-Wave USB for Home Assistant (I used Nortek HUSBZB-1, $50) Speakers (I used some early-model Sonos speakers) Probably a tablet to act as a disarm/arm location (I used Amazon Fire 7 (2019) $50 on Amazon) - you can also use any phone with the HA app, or any computer. Steps to get it working: Get your door sensors connected to your Z-Wave coor...

IoT button for Home Assistant - IKEA Tradfri

Image
The project: "I need a button for the bedroom, so I can get your attention when you're downstairs." I looked for a button that was inexpensive and could link up to my existing home assistant setup. Sadly, it took awhile to get a Tradfri - they were frequently low or out of stock at the IKEA 60 minutes away. I eventually just mail-ordered two when they got in stock. Nice size. Good weight. Uses Zigbee. Did not come with real instructions (probably supposed to install the app). Zigbee pairing modes for Home assistant and IKEA Tradfri Configuration > Integrations > HubZ Smart Home Controller (add it if you don't) > Configure. To have Home Assistant go into pairing mode, click on "ADD DEVICE" in the lower-right corner.  Eventually I figured out you needed to click the button next to the battery 5 times in succession to be in discovery mode. A small red LED will blink through the front case when it starts trying to pair. First Roadblock I use a Nortek HU...

Motion Detection with Amcrest Part 2: Sending a Photo through Automation

Image
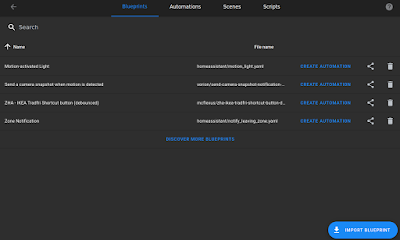
 I managed to set up motion detection previously. Currently, there's a live feed of the camera on Home Assistant, as well as my Synology NAS. My NAS also saves 10 seconds around the motion event trigger - if I get a home assistant motion detection alert on my phone (or on my watch through my phone), I can boot up a connection on my NAS, browse over to security feed, look at the timeline...but that's time. If I'm asleep in bed, it's kind of crazy to boot up your computer just for that. There were different solutions for this - the Amcrest app or Home Assistant solutions through Node Red and/or automations. I want to keep solutions in-house as much as possible, so that left Node Red and automations. You will need to have the home assistant app installed on your phone. I hit a roadblock fairly early and often...how do I identify the picture taken, where is it stored, and how to send it. This solution came up as I was looking at blueprints for something else. Honestly, it w...

Motion Detection with Amcrest

Image
The setup of the basic Amcrest Wifi camera does require a non-HA interface to initially set up. In my case, I used their app on my Android phone. My experience was straightforward - Add a Device, walk through their steps. Done. Adding it to Home Assistant was more interesting. This is added to your base configuration file   If you've read my previous entries, using the !secret can be skipped if you just want to leave the host IP, username, and password in your configuration file. If you don't care about motion sensor triggers, you can skip those last two lines. Once you restart Home Assistant, BackdoorAmcrest will be visible as an entity. What I wanted though - if there's something triggering the motion sensor...I don't just want to record it for later, I want to know about it. So I go to Node Red. Two parts: the trigger & the notification You'll notice "motion-detected" is a binary sensor, which means true/false. If you had set up the motion-detected ...

Adding a Nortek Z-Wave/Zigbee USB dongle

Image
Purchased online for $50, the Nortek Z-Wave/Zigbee USB dongle seems like the easy way to add Z-Wave and Zigbee functionality to Home Assistant.  What is Z-Wave? It uses radio wave frequencies to connect to each other, in the 800-900 MHz range. This means it's not going to interfere/be interfered with, from your wi-fi network (running either on 2.4 or 5GHz). The Z-Wave devices can (but not all do) repeat signals, creating a Z-Wave mesh. It's limited to 232 devices, which is plenty for my purposes, but allegedly opening up to more as time goes on. What is Zigbee? It is similar, but uses the 2.4GHz range. Zigbee devices can also create a mesh, but due to a multitude of different implementations, one Zigbee device may not link to another brand's Zigbee device. Zigbee send messages faster, and can have 65,000 devices on the network...which seems like overkill. To Choose, or Not to Choose Rather than pick one, and be limited to one type of device - the USB dongle seems like a fai...

Adding in a Kasa Smart KP-303 3-plug power strip (Smart Plugs)

Image
I have a couple of 3D printers in a small crafting room - I've automated control of the printers through Home Assistant, but still needed to go into the craft room to turn on the printers. I found a smart power strip on Amazon for $27, where I can plug in my two Raspberry Pi 2B+'s into the two USB connections (always on). The three grounded outlets each have a button or you can control it through the Kasa app/Home Assistant. Kasa App angle I did not see a way to avoid installing the Kasa app...you need it to assign the network/password to your power strip. The Kasa app lets you control the power strip remotely, but I will continue to look for a way to strip the app out of the loop. (Once I have it working with Home Assistant, I don't want Kasa to remove it with an update.) The Kasa App itself was easy to install. It does ask you if you want to enable for Google Assistant/Amazon Alexa/Samsung SmartThings - but you can skip that. Once you add the device, in the Devices menu, ...